
A very common problem that many cowboy boots tend to have is that they are loose around the calf when you take them off. While getting your shoes swapped for a tighter fit is sometimes the best option, this simple guide to tightening thigh-high boots, trainers, and more is a smart alternative. What’s more, it’ll help you out if you’re set on a style or find it difficult to get shoes to fit correctly. With this in mind, I have written a guide on making cowboy boots tighter around the calf and hopefully give you better and more satisfying results than what most people get with these things.
The first thing to do is remove any stitches using a boot knife or seam ripper. We will need to remove the top stitch to make the boots tighter around the calf.
After removing this stitch, we will need to cut a couple of new holes at a slightly higher level to make it possible for us to tighten the boots using a lacing technique. When doing the cutting, you will need to make sure that you do not cut too high or low as this could cause the boot to be fitted incorrectly and, even worse, fall off. A rough idea of how much higher we should cut would be between 4cm to 6cm higher than the original holes.
From here on out, you will need a pair of laces that you can lace through your boots and tie tight enough that they stay in place and do not keep falling out or loosen after wearing them for a little while.
5 Ways To Make Cowboy Boots Tighter Around The Calf
Way 1: Add a Belt
Before you put on your Boots, apply a belt to tighten them around your calf. The belt will provide a tight enough fit so the rest of your clothes will fit looser, making your boots look better and more fashionable.
Way 2: Re-lace Your Boots
Re-lacing your cowboy boots correctly is another technique to tighten them up. One end of the shoelace should be threaded through the top hole on one side of the boot, and the other end should be threaded up through the bottom hole on the same side.
Tighten the shoelace at the top of the boot and cinch it. Continue to do this with each shoe until you have all four holes laced.
This will make your boots look more polished and elegant by tightening them.
Replace the laces with a pair of higher-quality laces. Many of the most popular online shoe stores and shoe repair companies carry these.
Way 3: Shrinking Using Elastic Bands

If the boot shafts are too large, you can cut elastic bands into 2-inch pieces and thread one through each hole on the boot shaft.
Step 1: Tie a rope
Tie knots at the end of each elastic band to prevent them from sliding out.
Step 2: Shoelace adjustment
Pulling on these tightens up the loops around your leg, making it fit more snugly. This trick is most effective with boots with eyelets instead of loops, as pulling through eyelets works better than pulling through loops.
But note that this method is ineffective if your boots are made from soft leather or suede, as it will stretch the leather to the point where it will be too big ever to wear again. It can also weaken the threads holding the eyelets onto the boot shaft, causing them to work loose over time.
Way 4: Use A Hairdryer To Shrink The Shoes
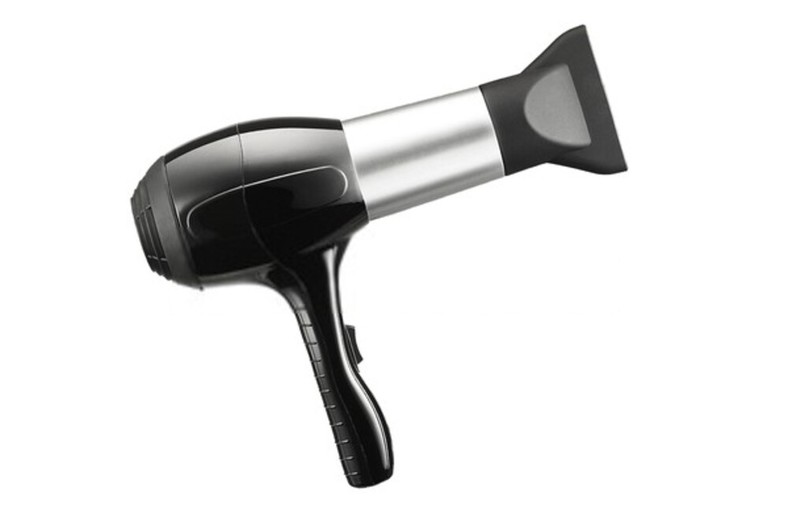
You can stretch shoes with heat, and as it turns out, you can shrink boots with a hairdryer. This approach works best on shoes that have leather in just a few places or that have a few bigger sections. You may use it to shrink just the sections that are shrinkable and leave the rest untouched.
To begin, you will need a spray bottle. Fill it halfway with water and spray the leather sections or the portion of the boot that has to be enlarged.
If you do not have a spray bottle, you may dampen the areas you want to shrink using a towel or a sponge.
Following that, using your hairdryer, blow on the wet parts from a distance of around 6 inches. This will cause the boots to shrink. It is almost identical to the wet-and-wear procedure, except that the boots are not completely submerged in water.
Assuming you cleaned the shoes well before shrinking them (which you should always do first), you may add leather conditioner.
Way 5: Go To A Professional
If you want to make cowboy boots tighter around the calf, it’s best to head to a professional. It would be best if you had a professional do this so that the length of time the boot is being fixed is as short as possible and that the process goes smoothly and without complications. In addition, the person you’ll be speaking with will provide assistance and guidance, which will then allow for a quick turnaround time.
Once you’ve brought your boots to the factory, they will need to unwrap the shoebox and scrutinize it for any damage. Next, they’ll go through pulling each boot off one at a time and taking the sole off. They will then check each sole for cleanliness and replace any worn pieces with new ones in good condition. Once all of this is completed, they’ll go back into the box and re-wrap them for you.
It would be best if you asked the factory to be told to get a tight fit and provide a better and more professional look.
How To Use Insoles To Make Shoes Fit Tighter
If your boots seem to be slipping off of your feet and you’re struggling to get a tight fit around the calf, try tightening the straps of your boots by using insoles. It works like an elastic strap that makes bootstraps tighten around the calf muscle. You can add an insole to any boot or shoe by cutting it out with a pair of scissors and placing it inside your shoe. The more aggressive the heel, the tighter you’ll want to make your insole; more conservative heels will require less support.
Step 1: Add the insole
Cut a piece of material about 1 inch shorter than your shoe or boot. Next, cut out a small half-moon shape from the piece, with the point at the front of the shoe, and take a small part of it through your lace holes. Then, fold it in two and slide it between the laces. Fold-down one side and then flip over on itself to hide on the inside of your shoe.
Step 2: Tie your laces
Pull each lace through to the toe and tie a knot to secure the insole.
Step 3: Adjust your laces to fit snugly around your calf
Buns of steel are not required, but it will help. Your boots may still slip a little, but just pull your laces up, and they’ll feel much more secure than before—and you’ll be able to wear them longer.
Should Cowboy Boots Be Tight At First?
No, they should not be crammed in at all.
Cowboy boots were created to serve wild cowboys on wide grasslands; they must survive heat, rain, and severe weather…
Thus, although cowboy boots are quite robust and tough, if you purchase them too tight at first, stretching them will take a long time or a great deal of work.
Thus, you must select boots with a tight fit in the heel and instep since these are the two most critical locations. It is irrelevant if other places are broad or not as long as the heel and instep fit tightly.
How To Clean Cowboy Boots
Before you get started, make sure you must have the following items on hand:
- Rubberized brush
- Shoe polish or conditioner for leather boots
- Leather cleaner for suede boots
- A large bowl filled with water and a squirt of dish soap
- A sponge
- Cotton balls. Lint-free clothes are also helpful. These can be dampened with water if necessary.
After that, we will clean off the boots step-by-step:
Step 1: Choose the proper method of cleaning depending on the material.
For instance, for leather items, you can put in a small amount of water (just enough to moisten the brush and keep it in the boot) and use a soft brush to scrub with. If your boots are suede or nubuck, place them in a bowl of water and add dish soap; scrub with a very soft brush, using circular motions; rinse off when done (or when you get down to the dark lining).
Step 2: General cleaning
For general cleaning, dampen the sponge in water and apply it to the interior of your boots; then apply shoe polish or conditioner (if needed) to it; repeat this step for the exterior.
Step 3: Clean dust inside và outside
Dust the inside of your boots with a powder (such as baby powder, talcum powder …); leave outside only if you are in a very dusty environment. This step is highly recommended when your boots are new because dust can be very harmful in prolonged exposure for leather items;
Step 4: Polish the boots.
For suede boots, choose one of the spray polishes; choose one of the creams for leather. Please apply only to the areas that need it (the laces, crevices, etc.), using circular motions with feather-like brushes (for creams); do not put too much, or it will get sticky.
Step 5: Clean up excess paint
Wipe off any excess polish with a damp cotton ball or cloth; repeat this step if necessary to get an even result
Step 6: Use a color protector
If you choose to use a color protector, apply it to the leather using a soft brush.
Step 7: Complete
When done, take out your boots and let them dry overnight to soften the creases and bring back their original appearance
Read more on How to Clean Cowboy Boots?
What Are Cowboy Boots?
Cowboy boots are boots that cowboys or Western-themed people traditionally wear. They are usually made of leather and have a simple, squared-off toe. The term cowboy boot is sometimes used to refer to any boot with similar traits, including Australian Ropers (the most popular brand) and football (soccer) boots.
The style may make them hard to wear comfortably in the city, but they can be custom fitted with insoles and heel lifts for those who want the look.
Cowboy boots were worn by the people in the American West while working on ranches. They were initially made from cowhide leather, but nowadays, most women’s cowboy boots are made from materials such as leather or imitation leather, with a fabric lining and a sole made from various synthetic materials. This can also add decorative details such as fringes, braids, metallic work, and tools to give an individual style.
The term “cowboy boot” has also been used to describe men’s clothing. Usually, casual dress shoes are meant for casual wear but have a western styling. The cowboy boot is widely used in fashion because of its versatility and versatility. Men can wear them as regular business shoes or formal boots. Women may use them as sandals or high heels.
FAQs
How do I make my boots tighter around my calves?
You can make your cowboy boots tighter around the calf by adding a liner inside the boot. This will provide some additional support and compression, which will help them to stay up on your leg.
If you need to remove some of the wool from your liner, use scissors or pinking shears (available at most craft stores) before sewing it into place.
What should you avoid when trying to make your boots tighter?
Making them too tight will cause excessive wear and tear on the boot, not only causing damage but also ruining their shape.
Are boots supposed to be loose around the calf?
No.
It is not normal for cowboy boots to wrap around the calf with ease. To make your boot tight around your calf, you must use a method that includes over-stitching over the “saddle” area, where the upper meets the top part of the boot.
A little bit of extra effort can go a long way in increasing how well your boots perform, even if they are old or inherited.
Should cowboy boots be tight or loose?
The tighter, the better!
Cowboy boots are typically supposed to be tight around your calf. But if they’re not, it’s time to make them tighter! Here’s how:
First and foremost, you will need a partner for this task. It would help if you also had a pair of needle-nose pliers or shoe trees that have been soaked in warm water beforehand.
What’s the best way to tell whether your cowboy boots are too narrow?
It’s all in the toes. If you can’t wiggle your toes inside of your boots, then they are most likely too snug. Some cowboy boot brands have been known to lace up over the top of the foot, creating a wider appearance from the outer calf down instead of around it. It is essential to wear a thicker sock to get a more accurate measurement when trying on a pair.
Should you get boots a size bigger?
No. A size bigger will make it difficult for you to lace them up, and they’ll be much more uncomfortable. So instead, when you get your boots, lace them up snugly around the calf with elastic stockings. Let the boots stretch in for at least 24 hours before trying anything else.
How much heel slip is normal in boots?
Indeed, while wearing cowboy boots, it is hard to totally prevent heel slippage. Heel slippage provides additional comfort while wearing boots. However, heel slippage should occur within permissible limits.
Slippage of 1/4′′ To 3/8′′ is usual for freshly acquired cowboy boots.