
Welcome to Hood MWR!
Hoodmwr is a blog that talks about fashion and what celebrities wear. The site mainly concentrates on shoes, outfits, what celebrities wear, sports and fitness, work, and travel.
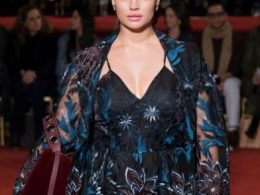
Celebrities’ Heights
The Famous People


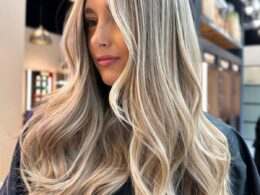
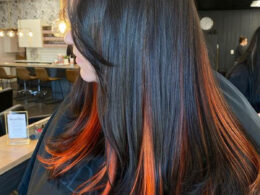
The Celebrity Hairstyles


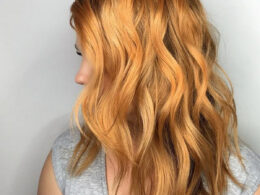
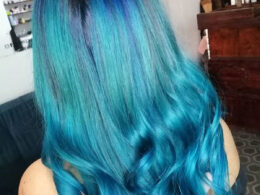
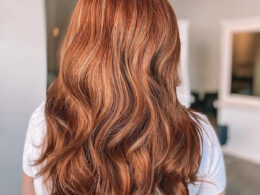
Most Popular Hair Color Styling Ideas


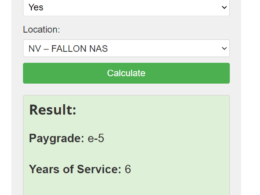
Most Popular Online Calculator


WHAT’S NEW

Ultimate Guide Of Sola Salon Prices
Welcome to the world of Sola Salon Prices! If you’re looking for a fantastic salon experience…

Does Henna Expire?
You are captivated by the combination of red-brown color combination, or if you love red brown…

Hair Breakage On Top Of Your Head
Hair breakage on the top of your head can be a distressing and frustrating issue that…

What Is The Bleach To Developer Ratio? Basic Guide
Understanding the bleach-to-developer ratio is essential if you’re curious about transforming your hair color and are…

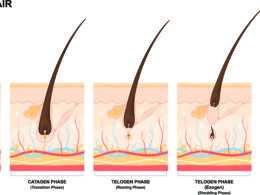
The Stages Of Locs: From Starter Stage To Rooted Stage
This exploration of the different phases of locs will be an interesting and educational experience, regardless…

Can You Keep The Conditioner In Your Hair for An Extended Period?
Conditioning is an essential step in many hair care routines, and it often leaves us wondering…

Unlocking The Charm: A Guide To Medium Length Haircuts With Layers
Welcome to the world of medium-length haircuts with layers, where sophistication meets versatility. Medium-length haircuts perfectly…

Guide For 1C Hair Type: Everything You Need!
When it comes to understanding hair types. Each hair type has its unique characteristics, and one…

How To Put Beads In Your Hair At Home? The Simple & Easy Guide!
Adding beads to your hair is a fantastic way to infuse charm, style, and personality into…

Did Vikings Have Dreads?
While Vikings had some unique and impressive hairstyles, they didn’t exactly sport traditional dreads as we…

Wella T14 Before and After Transforming Your Hair with Wella Toner
Welcome to the world of hair transformations! If you’ve been searching for that perfect hair color…

Hair Developer: What Is It? What Could It Do To Your Hair?
Hair developer plays a pivotal role in the realm of hair coloring and is an indispensable…

Is Hair Dye Supposed To Burn Your Scalp?
Hair dye is a cosmetic product used to alter the color of one’s hair artificially. It…

Cost Cutters Prices in 2024
Welcome to Cost Cutters – your go-to family salon, where cater to your haircare needs, those…

Can You Bleach Your Hair With Clorox?
While it’s true that Clorox bleach contains active ingredients that can lighten hair, it’s not the…

Keratin Treatment On Bleached Hair: Is it safe?
Bleached hair tends to be more porous and fragile, for a carefully tailored Keratin treatment can…

Does Your Scalp Itch When Your Hair Is Growing?
I understand the frustration you may feel when your scalp starts itching as your hair grows.…

Can I Lighten My Hair With Just Developer?
Hair developers are indeed fascinating products that can work wonders on your hair . In this…

How Hot Does A Hair Dryer Get? Use A Hair Dryer Properly
The hair dryer, a remarkable invention, is your trusty companion on the journey to achieve that…

Does Loreal Hicolor Damage Your Hair?
With its wide range of bold and intense colors, Loreal Hicolor has gained popularity among those…

Wella T27 Result: Before And After Using
If you’re on a quest for gorgeous, salon-worthy hair transformations, then the magic of Wella T27…

Mixing Purple And Red Hair Dye Guide
Welcome to the world of vibrant self-expression! Embarking on the journey of mixing purple and red…

Perm Hair: When After a Perm Can I Wash My Hair?
If you’re wondering when you can finally wash your luscious locks after getting a perm, fear…

Can You Swim With Box Braids?
When it comes to swimming and hairstyling, the question arises: can you swim with box braids?…
Featured Articles


Sports
Walking
Feeling old? Feeling like you’re no longer able to do what you used to be able to do? Well, it’s never too late! Walking is a sport that has no age limits. Its convenience, cost, and simplicity make it the perfect sport for all seniors. Here are some tips for getting started with walking as your new favorite activity.
Walking makes you appreciate the scenery. Seniors often complain that they can no longer enjoy the scenery as they once could. A long walk on a beautiful path has the potential to be a very enjoyable experience for seniors, as well as an enjoyable experience for everyone who witnesses it. Walking gives some seniors the perfect excuse to get out of the house and see new places, see old friends or make new ones, and keep those friendships going. It also gives those who love nature the opportunity to enjoy it even more.
Running
Fort Hood is a very fit base, and that means that there are plenty of people who like to run, and a lot more who don’t. However, the Military requires that all new soldiers be able to pass a 2-mile run within 1 minute of 10 minutes. With this in mind, they offer running clinics that can help you get into shape. It also means you can buy apparel or equipment at the Fort Hood post exchange for your training. In addition, you can find more information about shoes on this website.
Swimming
There are many swimming pools and areas around fort hood to swim. There is also a diving tower for dive practice and swimming. In addition to these facilities, there are also lifeguards which although you may not be able to swim they can help you learn.
Mountain Biking
If you are not a runner but you still want to get fit, then mountain biking is the perfect way to do it. It’s enjoyable and very physical, and if you like it enough, there are many competitions on the post that welcome military participants. Also, you can find gear for mountain biking on this website.
Gyms
Fort Hood MWR is well known for the amount of fitness and sports facilities it provides to its members. The gym that is located on base has 1,700 square feet of floor space that includes a variety of cardio and weight equipment. In addition, there are also nine handball courts, two racquetball courts, and an aerobics room where members can use cardio equipment. There are also nine Olympic-sized swimming pools with various water depths and temperatures.
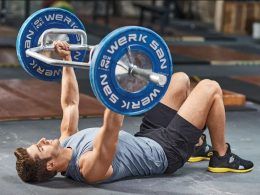
Physical Training
Physical training is the act of training your body to be physically better at performing tasks. It’s using fitness exercises, training methods, and diets that force your body to adapt by getting stronger.
Physical fitness in the military is good for a number of reasons. First, it ensures that soldiers are able to go out and fight effectively because they’re stronger and more physically capable. Secondly, it prevents accidents with equipment because the soldiers are used to making use of fitness equipment and different weights.
Horseback Riding
If you want to get fit and have some fun, then Horseback Riding is a good option. There is a great riding facility with horses available on post for the community who ride. In addition, you can join the equestrian team and do a little bit of competition within the ranks. You can find all kinds of information on horses on their website.
Aerobic Classes
Another way to get fit is through aerobics. There are many aerobic classes on weekends or during the week that include free classes for soldiers. In addition, you can find information about aerobic exercises on this website, and find a place to purchase the equipment at the Fort Hood post exchange.
Recreational Activities
Lake activities
If you want to get away for a while, but don’t want to go too far, then you should check out some of the lakes around Fort Hood. There are three lakes that are very close to the base. They can be found in Copperas Cove, Belton, and Harker Heights. If you’re looking for a more relaxed atmosphere, then check out the gravel lake in Belton or the sports complex in Lake Belton.
Camping
Camping in the fall, winter, or spring has never been easier. One of the best places to escape to is Fort Hood in Killeen, Texas. The campgrounds are located only 10 minutes from historic downtown Killeen and 30 minutes from Austin.
Camping facilities include paved roads for cars and tents, campsites with picnic tables and barbecue grills, water faucets for filling coolers or washing dishes. The campgrounds are well maintained and offer a variety of recreational activities such as camping, biking, rock climbing, hiking, and more.
The campgrounds at Fort Hood do not require reservations. There is a convenience fee for electricity and showers. Because there is a convenience fee it takes a little longer to get a campsite until the gates open in the morning. The camping rates range from $15 to $25 per night with the exception of Military Weekend when they charge $25 to $35 per night depending on location.
Hiking Trails
There are six hiking trails that stretch over of land at Fort Hood MWR. The trails range in difficulty, and the longest trail takes approximately four hours to complete. There are also several picnic areas, cabins, and restrooms along the trails.
RV Camping
The Camping area has 100 full hook-ups located throughout the campground. The campground also offers a dump station, showers, restrooms, laundry facilities, and a store. The store and gift shop offers items needed for camping such as ice (daily from 8 a.m.–6 p.m.), firewood, charcoal grills, propane tanks (refillable), A/C units, charcoal bags, and more at very reasonable prices.
Nature Of The Northwest
The Nature of the Northwest takes a look at the beauty that surrounds us in its own natural ecosystem.
In this, the introductory blog post we will take a closer look to see what our region has to offer. As we look through this blog it becomes quite clear that the Northwest is not your ordinary place and it does come with some extraordinary attributes. These are all things you might not be able to find anywhere else in North America.
Wilderness Area Directory
National Forest Directory was Established initially as a guide for the leaders and their employees to understand the depth of work in the Pacific Northwest, it motivates agency staff to focus on the local community’s priorities, make full use of the resources, laud accomplishments, and increase workers benefits.
Work and Life
Military Occupational Specialty
To meet the needs of military personnel and their families, the Army MOS List is classified into broad categories based on the work they perform to protect America.
MOS is Latin for “Military Occupation.” The Army assigns each soldier a Military Occupational Specialty (MOS), which is a number assigned by the Department of Defense and identifies his or her assignment within the military. A list of current and past MOSs for each career field is available through the command quartermaster at each installation. Soldiers can also view MOS information through the DEERS soldiers’ record.
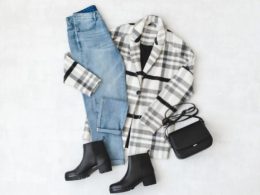
Work Boots
It’s time to come outside and get to work! You can find all kinds of work boots on this site, and whether you are looking to purchase the latest model, or even something more old school, you are sure to find something for you to wear. These boots are designed to protect the wearer and keep them operating at optimal efficiency.
Sport and Military Gears
Tactical Equipments for Military Training
Military-grade equipment is required to survive on the battlefield. This means you must have these gears in your outfit when you’re headed to the new battleground. Tactical Gears are the most commonly used by all kinds of soldiers. The variety of brands, styles, and prices lets you find the best gear for your needs. It’s no surprise that tactical gears are so popular; they can be used to protect all kinds of situations.
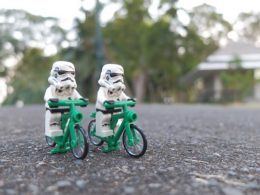
Bicycles for Cycling
Bicycles are a great way to travel when you need to get from place to place fast. Bikes can be used by soldiers when they need to quickly reach a battle when they’re in a hurry. They’re lightweight and easy to carry, and they can easily be stored in the back of the truck.
I’m sure you’ve heard of all the famous bike brands such as Trek, Cannondale and more but which ones are the best? A quick search on bicycle brands here will put that question to rest. I cannot even tell you how many times I was on a new battlefield and someone asked me what kind of gear I was wearing. I proudly said: “military gear,” and they were shocked! To give some insight on the subject, here, we’ve put together a list of some of our favorite bikes brands.
Shoes for Walking and Running
When you’re on a battlefield, you need to be as stealthy as possible. Walking and running are okay, but if you have the option, crawling is the best way to go. Crawling will help you stay out of sight from enemies. You can use specialized shoes for walking or running on all kinds of battlefields.
Camping Gears
If you are looking to go camping somewhere, then Fort Hood is a great place to do so. The base has multiple areas for tents and a lot more, but you can also find where to do that online. Also, you can find all sorts of camping gear here, from the best tents to camping chairs and more. Because we know that not every camper needs to spend a fortune on their outdoor experience.
Fitness Tools
Fitness and Health Calculators
Have you ever had a situation where you need to do a calculation, see the effect of two different treatments on patients, or compare two stats? Running a complicated statistic is not as straightforward as it may seem. Just ask yourself if what you are doing is worth the headache. It is much easier to use some calculators online which are accessible from any device.
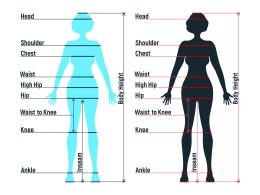
Body fat calculators are handy tools that can be used in person or online. They’re designed to provide an estimate of your current amount of body fat as well as your target goal according to the fitness guidelines established by the U.S.
The army body fat calculator calculates how much body fat you would have if you were in the United States Army. It also includes a pie chart to show whether your BMI is within an acceptable range. A BMI below 18.5 indicates that you are underweight and an ideal weight range for soldiers is 21-26 for women and 27-30 for men.