
Dutch braids and French braids are two of the most popular types of braided hairstyles. The difference between them is a bit small, but it could make a big difference in your hair. While Dutch braids require lots of practice, French braids only require you to know how to do one simple braid. Many women nowadays frequently wear french braids because it’s become a popular hairstyle for women, especially those with long hair.
This blog post will talk about the differences between both of these braids and how to do them.
Friend Braid
When it comes to hairstyles, French braiding is a great everyday go-to. It’s also one of the most popular and classic braids there is. French braids can be worn in all kinds of different styles for different occasions, but with enough practice, you can do them like a pro and make them your signature style.
French braids can be started at the front of the hairline or by pulling all the hair back. On one side, cut a small section of hair on one ear and divide it into three curls. You can start with either yarn and which one you choose is completely up to you! Work on the middle yarn first. Take the curls and start French braiding the rest of your hair, while keeping the rest exposed. You can braid this down until you want to stop it and use a plastic band.

Dutch Braid
The Dutch braid adds a touch of style to your hair whether you wear it straight or curly. This hairstyle may be created on any hair length. The Dutch braid requires strands of hair that are fairly thick and resistant to the ends becoming frayed. This hairstyle can be created with both natural or colored hair. It is important to let your hair grow out for about four weeks before creating a Dutch braid. This gives your strands enough time to adapt to the hair care regime that you will be using.
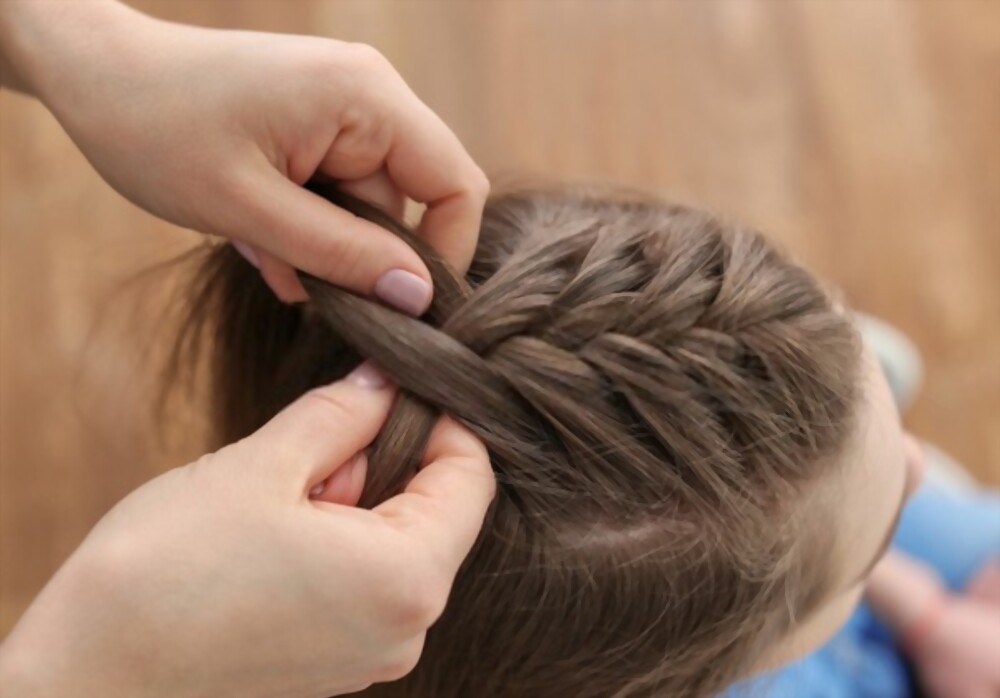
The inside-out braid is the opposite of the French braid. Unlike the French braid, where the strand of hair is introduced in the middle, you must bring the strand under the three portions of the braid in this case. Start by separating the hair into three sections from the back. The first one will be from the middle of your head until one-third of your hair is left out. The second section will include two-thirds of your hair being left out, and the third one will include all of the remaining hair in order to solve any problem with tangling.

Dutch Braids and French Braids: What’s the difference?
It can be quite hard to distinguish between Dutch and French braids, especially at first glance. However, as you look more closely, both of these types of braiding techniques are quite different from one another.
- Dutch braid: Dutch braids are created with three individual strands that are twisted together. Dutch braids create a smoother look than other braiding techniques, which is why they’re often chosen by hairstylists for updos and more formal occasions.
- French braid: A french braid is created with three individual strands that are also twisted together but all facing in the same direction (to contrast, dutch braids have each strand going in a different direction).
Both are created using a ponytail holder the same way. The main difference is the direction of each strand (in dutch braids, the strands go in a different direction than french braids).

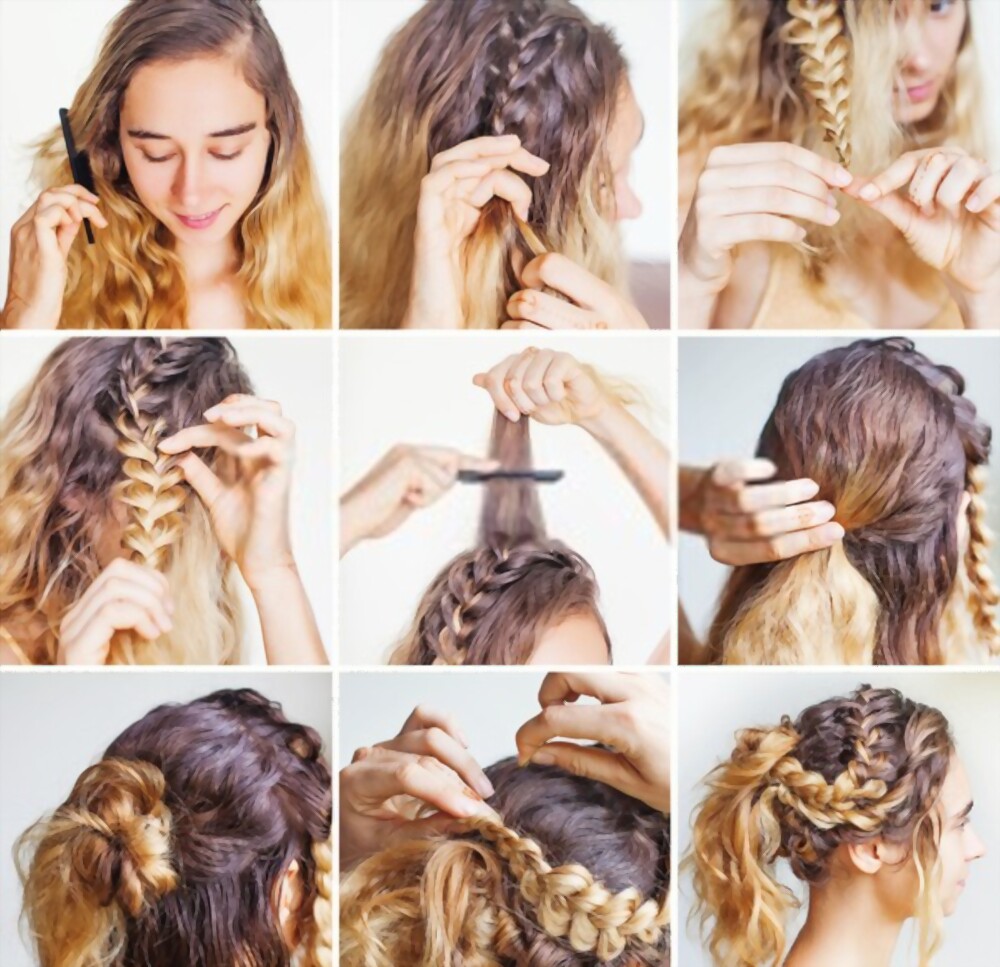
How to French Braid?
French braiding is traditionally done with loose hairs clipped close to the scalp, but due to its popularity has evolved into a more complex version that uses both long and short pieces of hair in various ways to create different styles.
Steps:
1) Using an elastic band or an open hand, hold your clean, dry hair in the middle of your head.
2) Cross first two fingers of your free hand against the middle of your head through your hair.
3) Loop the end of one side (right or left) over the top of the other.
4) Repeat steps 2 and 3 on the other side, braiding two complete sides.
This technique is a little harder to master than regular braids, but with a little practice you’ll be able to create different styles that suit you and your hair type.
How to Dutch Braid?
In order to create this hairstyle, you will first have to divide your hair into three sections. You can use the middle of your part as an indicator or you can braid the sections back in forth motions. If you have oily or dirty hair then you should try washing it prior to this procedure. When creating the dutch braid you will use two strands of hair. Once you have created two braids you should apply some hair gel or spray to hold your braid in place.
Step 1: After splitting the hair into 3 sections. You should cross the curls from the 2 sides in turn to the middle according to the rule that the outer strand will go beneath the middle strand.
Step 2: You will repeat the process and add strands of hair at a time until the desired length is reached.